Blog page
Group your regular blog post into a minimal and clean archive.
Create the blog page
Open Ghost admin, then go to pages and create a new page. Give the page a title (e.g. Blog, Articles, ...).
Next, open the page settings and change the page URL (slug) to blog. You can optionally add a feature image and an excerpt.
Finally, publish the page.

If you'd like the page description to have links, bold or italic text, remove the excerpt completely and add the text directly to the page content, then add your links and styles.
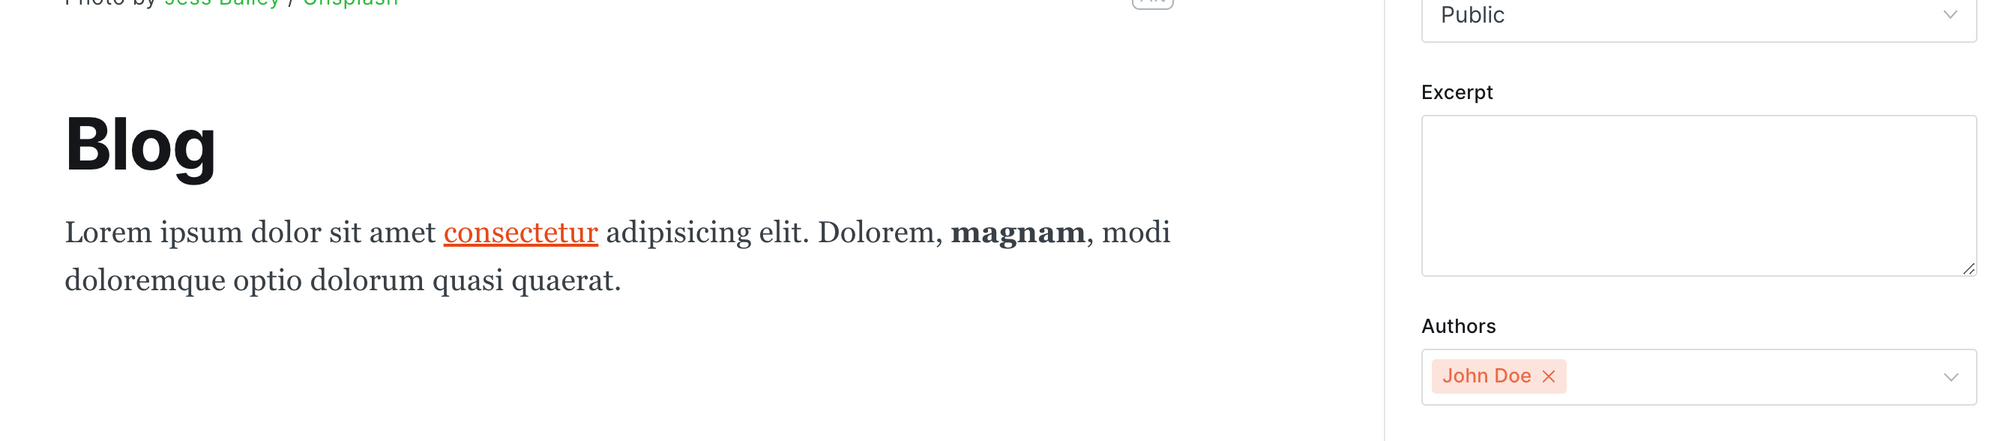
After saving the changes you should see the links and text styles on the page description:

Create the blog posts
The final step is to start filing the blog page with posts.
Open Ghost admin, then go to posts and create a new post. Give it a title and fill in the content as you normally would.
Next, we need to mark this post as part of the blog collection, to do that open the post settings and add the internal tag #blog to the post (internal tags must start with #).
The posts will appear in reverse chronological order (newest first) and grouped by month. The latest 3 featured posts will be pinned to the top.
Blog page layout
By default the blog page is designed as a minimal and clean archive. Since v2.0.0 we provide additional layout options:
Archive with images: Add the internal tag #blog-with-images to the blog page to enable posts feature images to be visible.
Grid layout: Add the internal tag #blog-grid to the blog page to have a 3 columns grid layout with images visible.
Directory Layout (since v2.3.0): To display blog posts grouped by tag, add the internal tag #blog-directory to the blog page, then add the normal tags you want to feature, each tag will have 6 posts visible and a "View all" link.
Blog post layout
Since v2.0.0, we provide additional blog posts layout options:
With table of contents: Add the internal tag #template-toc to the blog post to enable table of contents. Please note that you can't use wide or full width cards with this template.
Narrow: Add the internal tag #template-narrow to the blog post to have a post with the same styles as the documentation posts. Please note that you can't use wide or full width cards with this template.