Docs page
After installing the theme and uploading the routes.yaml file the next step is to start configuring the documentation pages and sections.
Create the welcome page
First, you need to create a welcome page, this is the first page that users will see when visiting your documentation, and the first link on the sidebar.
Open Ghost admin, then go to pages and create a new page. Give the page a title (e.g. Introduction, Overview, ...), then fill in the content.
Next, open the page settings and change the page URL (slug) to docs.
For better SEO, click on Meta data and fill the Meta title field with something more descriptive (you can just copy the general website description).
Optionally, you can add a custom excerpt too.
Finally, publish the page.
Create the sidebar sections
The sidebar sections are defined by tags configured on the welcome page.
On the welcome page you created previously, open the page settings and create a new tag for each sidebar section you want. The tags' order is important, the sidebar sections will appear in the same order as the tags configured on the welcome page.
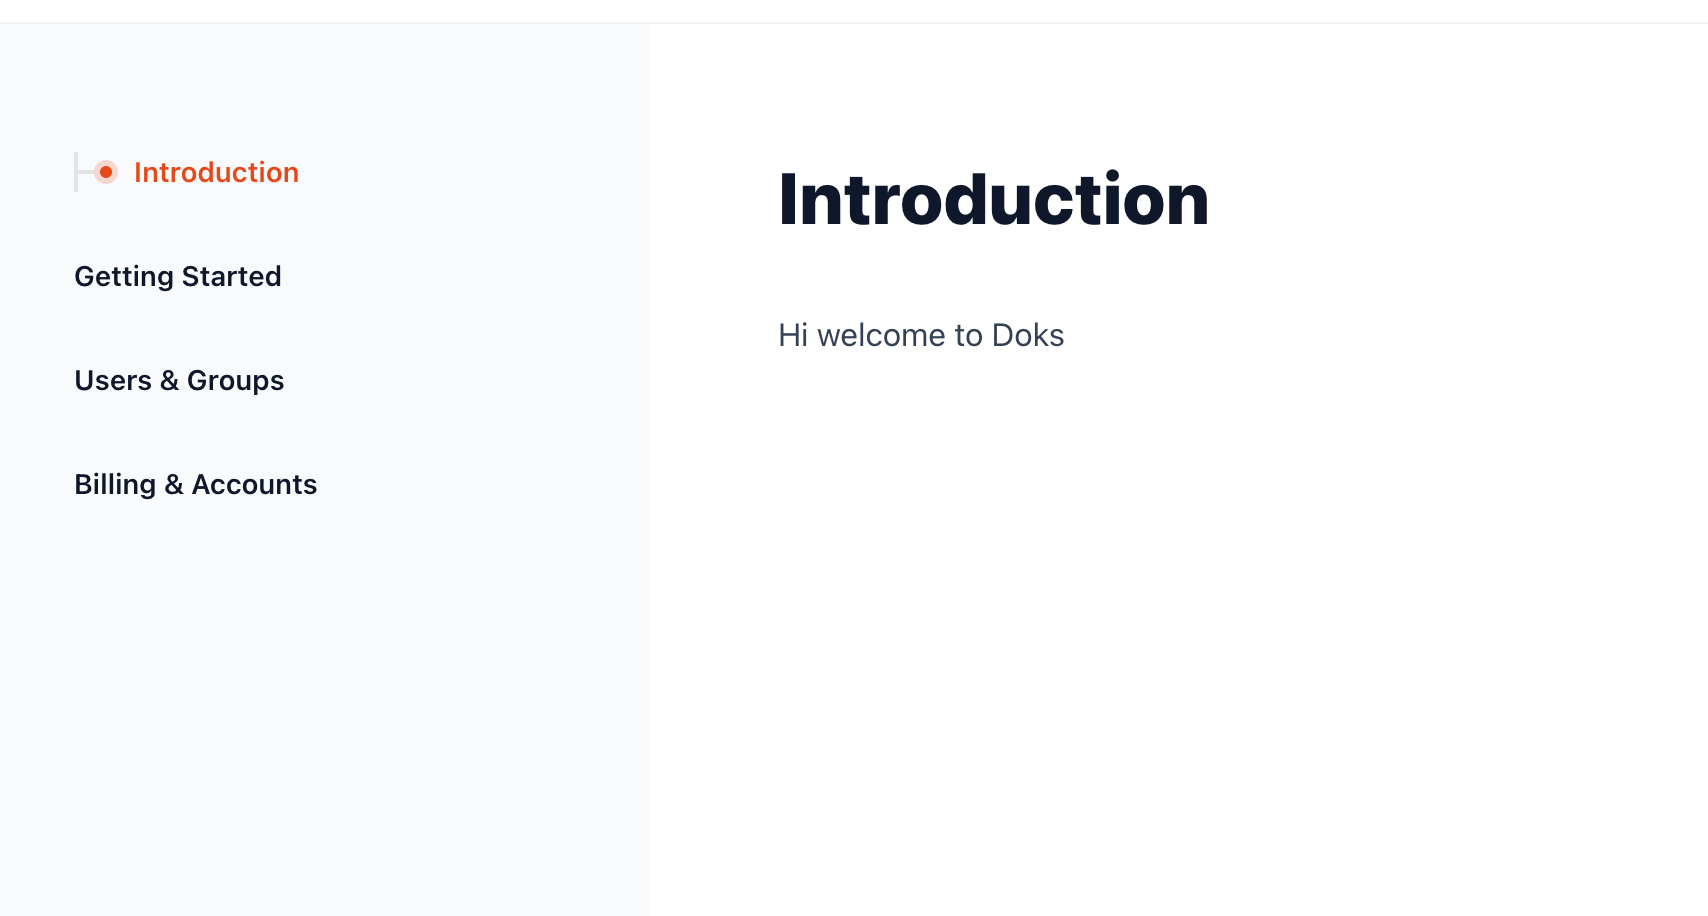
For example, if you want your documentation to have 3 sections: "Getting Started", "Users & Groups" and "Billing & Accounts", you will need to configure the welcome page tags as follow:
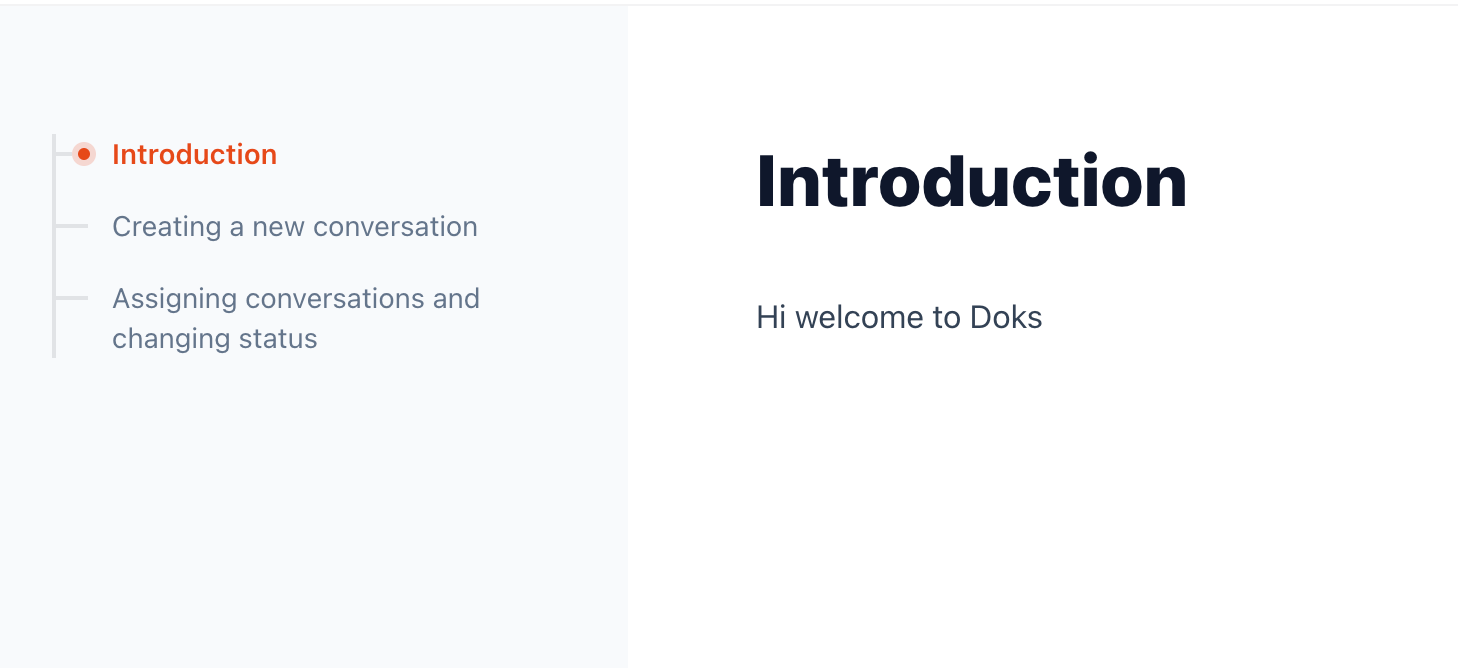
After saving the changes, you should see the sections appear on the sidebar as follow:
Create documentation posts
The final step is to start filing the sections with posts.
Open Ghost admin, then go to posts and create a new post. Give it a title and fill in the content as you normally would.
Then, on the post settings, set one of the section tags you created earlier as the primary tag on the post (the primary tag is always the first one).
Next, we need to mark this post as part of the documentation collection, to do that add the internal tag #docs to the post (internal tags must start with #).
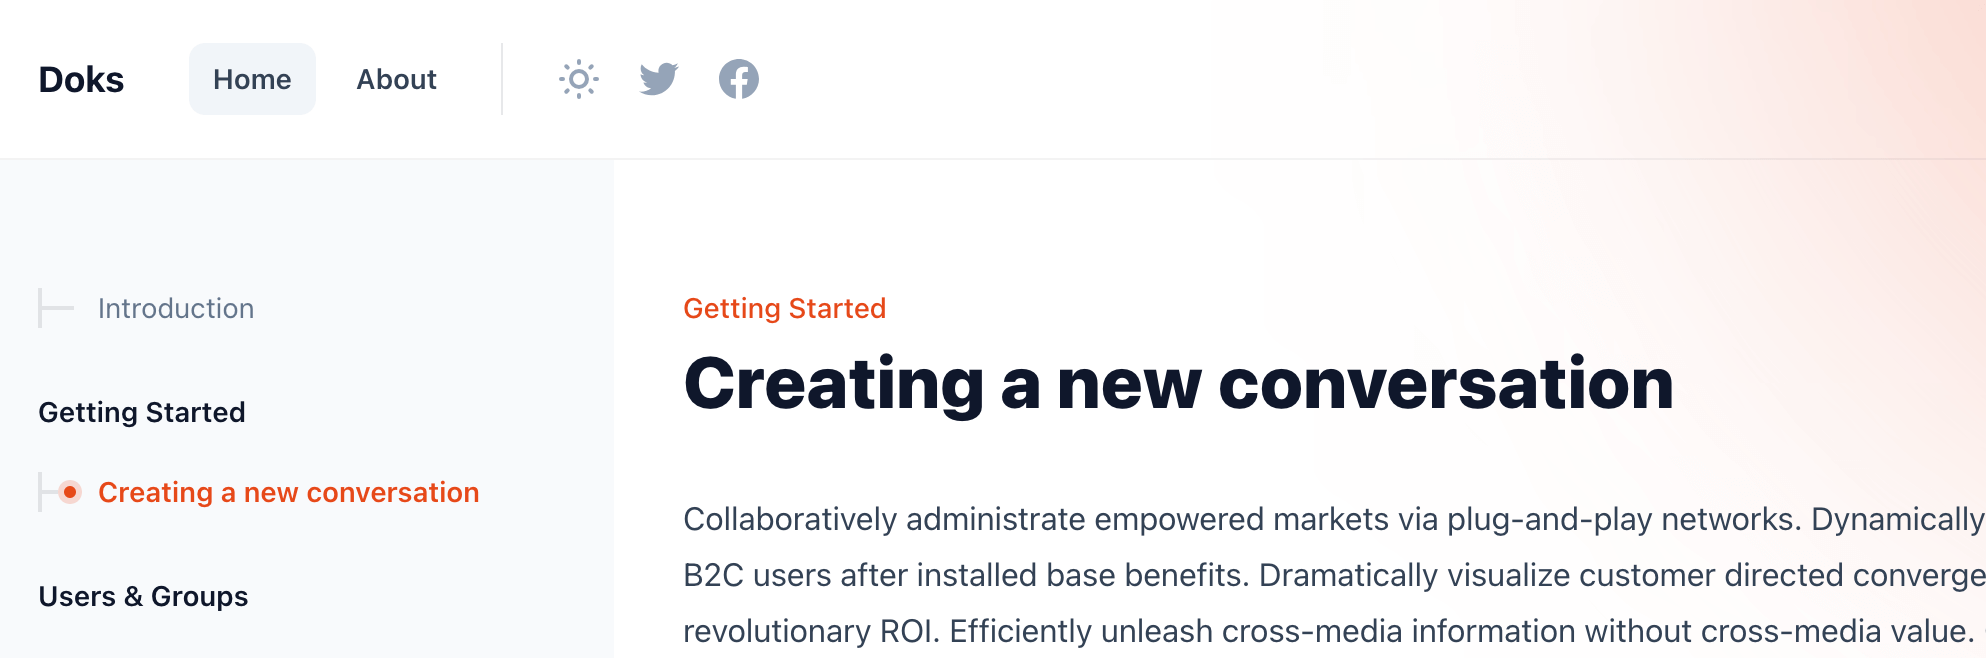
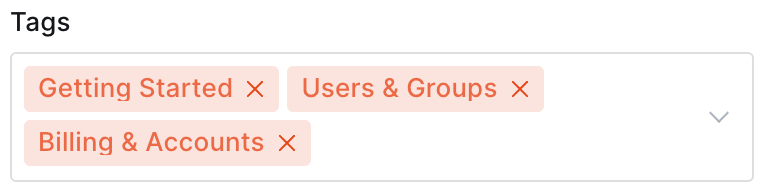
For example, to create a new post "Creating a new conversation" under the "Getting Started" section, the tags on the post should be set as follow:

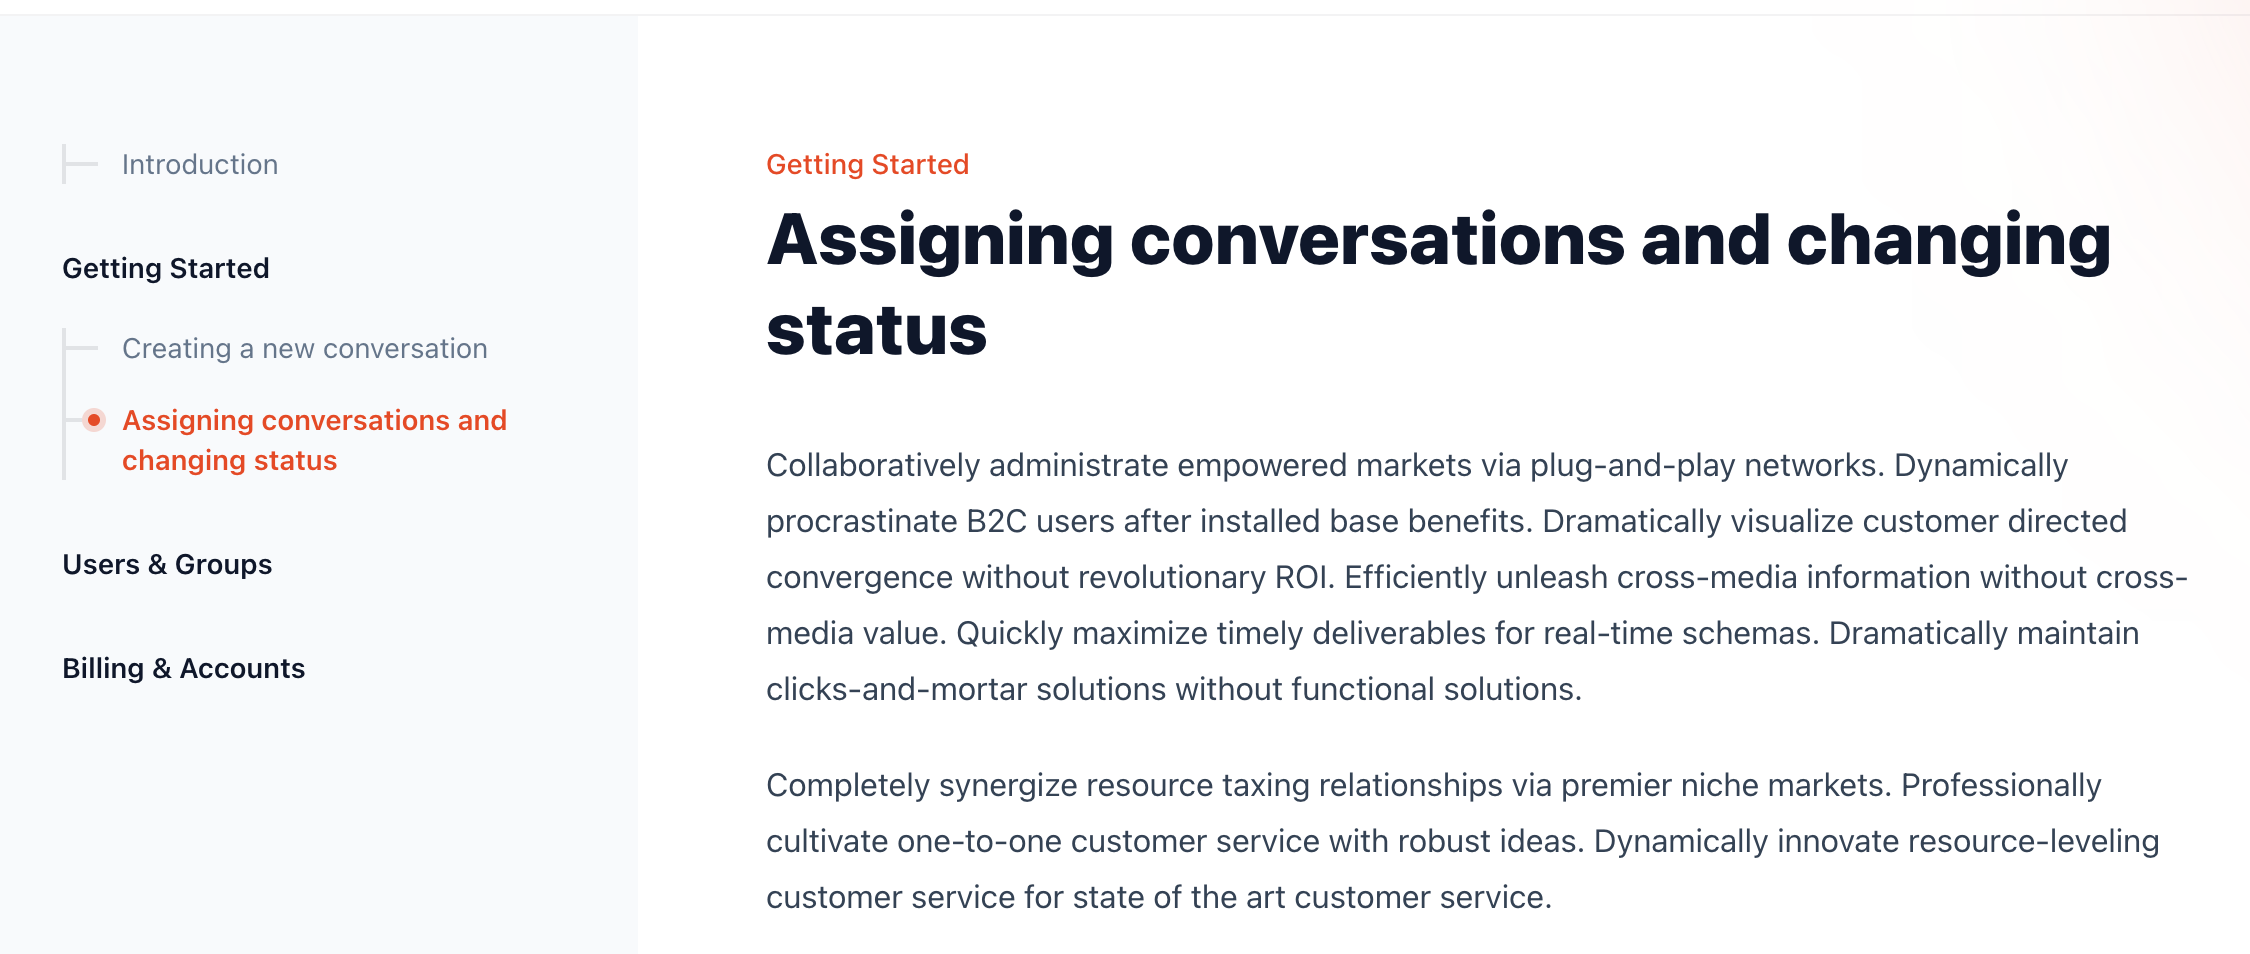
After publishing the post, you should see it appear on the sidebar under the corresponding section:
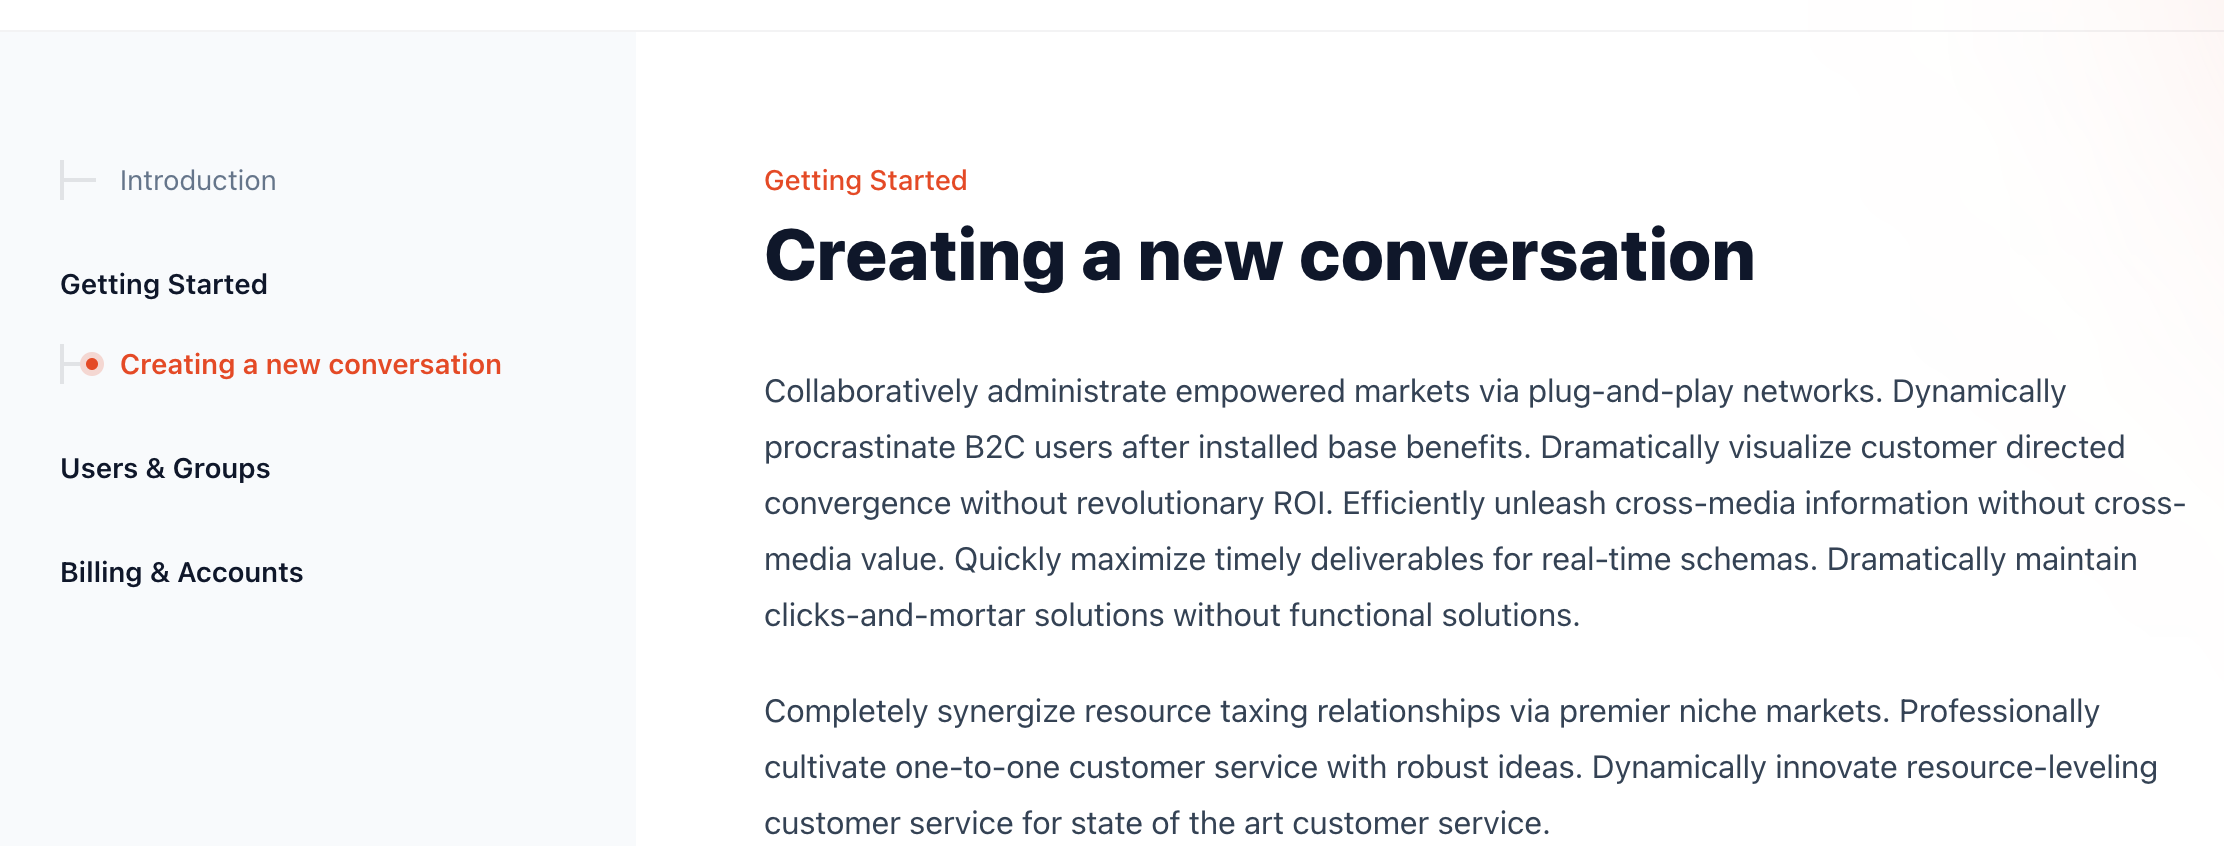
Posts under the same section will appear in chronological order (oldest first). You can adjust the order by changing the "Publish date" on the post settings.
Sidebar styles
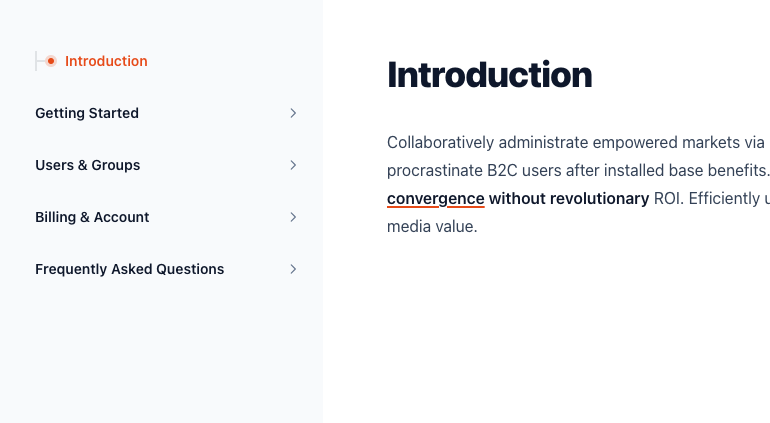
Hidden sections: If you like to hide the sidebar sections (if you have only one section for example), go to the welcome page and add the internal tag #docs-no-sections
Collapsible sections: Add the internal tag #docs-collapsible to the welcome page to enable collapsible sections that can be opened and closed, by default all sections are closed.
Opened collapsible sections: if you prefer the collapsible sections to be opened by default add the internal tag #docs-collapsible-open to the welcome page (it need to be added in addition to #docs-collapsible)

Important notes
Section tags must not be reused: The tags you created for the sidebar sections must not be reused somewhere else. Only use them on the welcome page (no other pages), and the posts marked with #docs (not #blog, not #changelog, ...).
If you need to reuse a tag, create a new one even if it has the same title.
Comments: Comments are disabled by default on doc pages and posts. To enable them add the internal tag #template-comments to the each doc post and page.
Multiple documentation: If you want to have multiple documentation on your website (e.g. Guides, FAQs, API, ...), please read the multi-docs setup.
Multi-docs setup
With Doks you can easily create multiple documentation collections/hubs. To do that, you'll need to make changes to the routes.yaml file.
As an example, we'll demonstrate how to create 3 documentation collections:
- API: accessible from the homepage /
- Guides: accessible from /guides
- FAQs: accessible from /faqs
Editing the routes.yaml
The default documentation collection that comes with the theme is configured as follow:
routes:

collections:
  /:
    permalink: /{slug}/
    template: index
    data: page.docs
    filter: "tags:hash-docs"

  # ...
Let's start configuring the API collection.
First, you need to change the data field to page.api, this means that the welcome page for this documentation is a page with an URL (slug) equal to api.
Next, you need to change the filter field to make it unique to this collection, tags:hash-docs is required by the theme so we'll leave it and add tags:hash-api to differentiate between the 3 collections. The final filter value should be "tags:hash-docs+tags:hash-api". This means that, to be part of this collection, posts need to have both internal tags #docs and #api.
The API collection declaration should be as follow:
routes:

collections:
  /:
    permalink: /{slug}/
    template: index
    data: page.api
    filter: "tags:hash-docs+tags:hash-api"

  # ...
Next, let's add the Guides collections.
Start by copy and pasting the API collection we configured previously. Then change the data field to page.guides and the filter field to "tags:hash-docs+tags:hash-guides", this means that the welcome page for this documentation is a page with an URL equal to guides and posts need to have both internal tags #docs and #guides.
Next, change the collection URL to /guides/ instead of /, and the permalink field to /guides/{slug}/ instead of /{slug}/.
The Guides collection declaration should be as follow:
routes:

collections:
  /:
    permalink: /{slug}/
    template: index
    data: page.api
    filter: "tags:hash-docs+tags:hash-api"

  /guides/:
    permalink: /guides/{slug}/
    template: index
    data: page.guides
    filter: "tags:hash-docs+tags:hash-guides"

  # ...
Finally, let's add the FAQs collections.
Start by copy and pasting the Guides collection we configured previously, then change guides to faqs in all the fields. The welcome page for this documentation is a page with an URL equal to faqs and posts need to have both internal tags #docs and #faqs.
The FAQs collection declaration should be as follow:
routes:

collections:
  /:
    permalink: /{slug}/
    template: index
    data: page.api
    filter: "tags:hash-docs+tags:hash-api"

  /guides/:
    permalink: /guides/{slug}/
    template: index
    data: page.guides
    filter: "tags:hash-docs+tags:hash-guides"

  /faqs/:
    permalink: /faqs/{slug}/
    template: index
    data: page.faqs
    filter: "tags:hash-docs+tags:hash-faqs"

  # ...
The final routes.yaml file should look like the following:
routes:

collections:
  /:
    permalink: /{slug}/
    template: index
    data: page.api
    filter: "tags:hash-docs+tags:hash-api"

  /guides/:
    permalink: /guides/{slug}/
    template: index
    data: page.guides
    filter: "tags:hash-docs+tags:hash-guides"

  /faqs/:
    permalink: /faqs/{slug}/
    template: index
    data: page.faqs
    filter: "tags:hash-docs+tags:hash-faqs"

  /blog/:
    permalink: /blog/{slug}/
    template: blog
    data: page.blog
    filter: "tags:hash-blog"

  /changelog/:
    permalink: /changelog/{slug}/
    template: changelog
    data: page.changelog
    filter: "tags:hash-changelog"

  /showcase/:
    permalink: /showcase/{slug}/
    template: showcase
    data: page.showcase
    filter: "tags:hash-showcase"

taxonomies:
  tag: /tag/{slug}/
  author: /author/{slug}/
If you plan to set up a landing page, make sure to adjust the routes accordingly and move the API collection to /api/:
routes:

collections:
  /:
    permalink: /
    template: landing
    filter: "tags:hash-landing"
    order: "published_at asc"
    rss: false
    limit: 30

  /api/:
    permalink: /api/{slug}/
    template: index
    data: page.api
    filter: "tags:hash-docs+tags:hash-api"

  # ...
Better organization for duplicated section tags
Let's suppose you want to create a sidebar section "Getting Started" on each of the 3 collections you configured previously.
For the theme to work properly and to avoid duplicated content, you need to create 3 different tags, one for each collection, and assign each one to the corresponding welcome page and posts.
Let's start by creating a "Getting Started" section tag for the API collection:
- Go to your Ghost admin, click on Tags, then click on New tag, then fill in the name field with something like Getting Started (API), we added "(API)" to the tag's name to make it easier to differentiate between the 3 tags on the Ghost admin UI.
- Next, change the slug to something like getting-started-api
- Finally, expand the Meta data section and fill in the Meta title field with Getting Started, this will be the publicly visible section name.
Repeat the process for the Guides collection:
- Name: Getting Started (Guides)
- Slug: getting-started-guides
- Meta title: Getting Started
And same for the FAQs collection:
- Name: Getting Started (FAQs)
- Slug: getting-started-faqs
- Meta title: Getting Started
Now, you'll see that's easier to distinguish between the 3 tags on the Ghost admin UI.
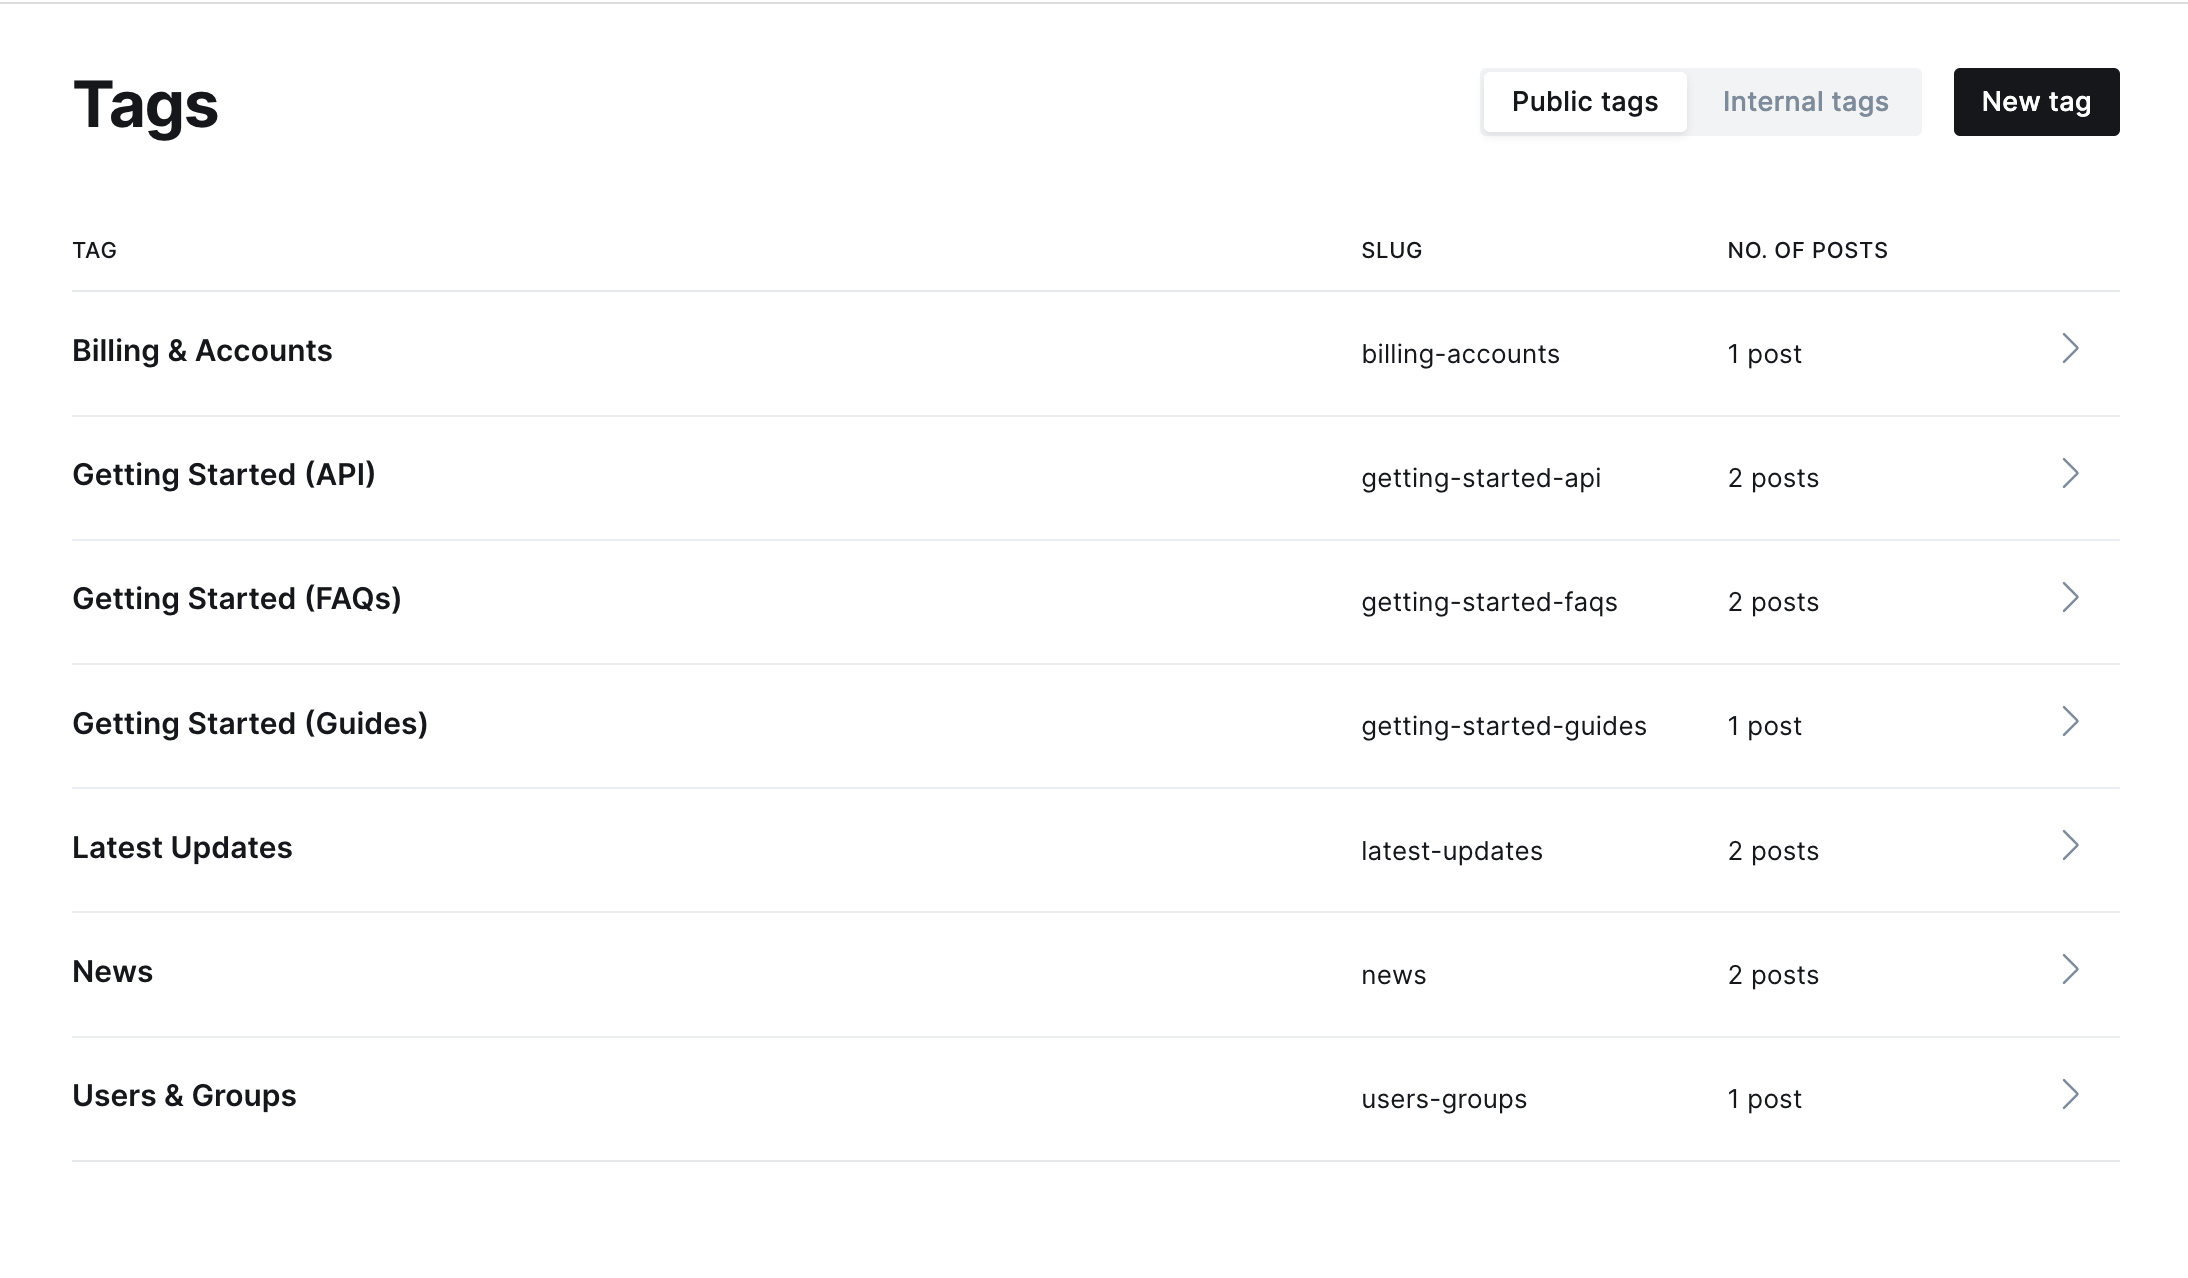
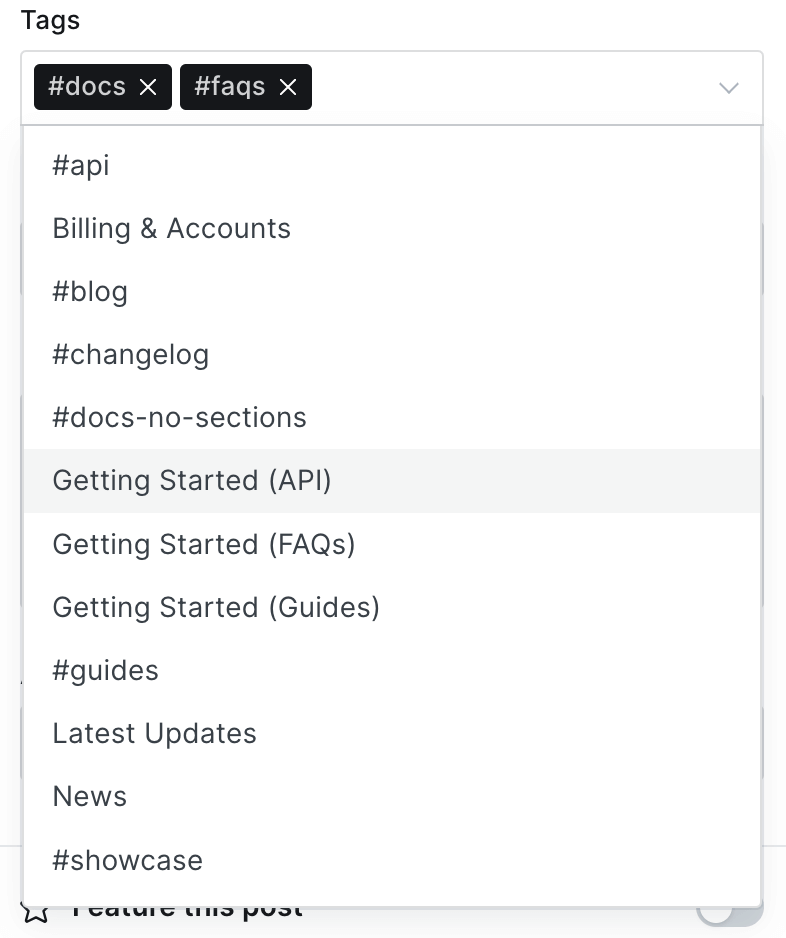
And it becomes easier to select the correct section tag when adding it to the welcome page or a post:
And finally on the website all sections will keep the same name "Getting Started":